How to turn a photo into a Cookie Cutter and Stamp with Cookiecad
Want to turn yourself or your friends into a cookie cutter or cookie stamp? You can, with Cookiecad! This guide will show you how to turn your photo into a cookie cutter that you can purchase from us, or, if you have your own 3D printer, you can 3D print it for free.
First we need to turn the photo into a monochrome (two color) image. This so that Cookiecad will know where to draw the lines to imprint your photo. There are various websites that can turn a photo into a stencil or two color image. For this example we'll use cutecutter.com.
Choose your photo
We'll use this iconic photo of Albert Einstein.

Upload your image to cutecutter
Adjust the settings until the image is to your liking. Try to avoid small dots or tiny details as your 3D printer has a limited resolution. The larger and fewer the features the easier it will be to print. When we are done we will need a PNG or similar format. Cutecutter downloads an SVG so we will take a screenshot instead. You can use the remove background tool to get rid of the background. Here is Einstein once we are done

Add a border
The image above has many holes around the edge so Cookiecad will not be able to create a cutting edge. Our next step is to either close those holes or draw a border around the image. We'll take an easy step and draw a circle around the image. If you have a PC with Windows you can do this in paint.net, a free program. If you have a Mac you can use Pinta, Pinta is also free and available on Mac and Windows. Here I'll show how to do it in Pinta but the steps are the same in Paint.net. You can use any image editor for this step - including any paint or image editor on your phone or tablet.
Install Pinta using the link above
Paste the image from the clipboard into Pinta
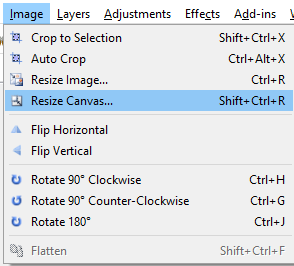
Go to Image -> Resize Canvas so we can make room for the circle. Choose 150%. and press ok.
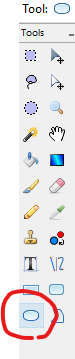
Click the circle tool on the left
Draw a circle around the face. Don't worry about the checkerboard pattern as that just indicates transparent sections, which cookiecad will ignore.

Save the image. Choose PNG when you are saving and put the image somewhere on your computer where you can find it.

Create your cookie cutter
Go to cookiecad.com and scroll down to see the button to upload your image. Click the button and upload your image. Click "imprint" next to "Interior features" to see a preview of your cutter
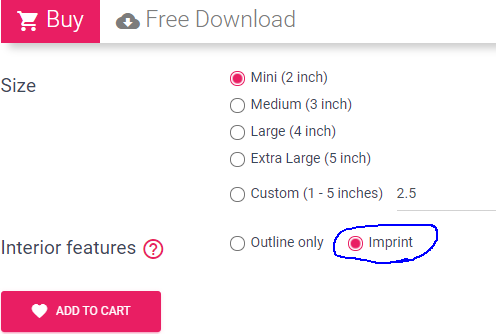
If you want to purchase this cutter, choose your size and click "Add to Cart" and you're done! If you want to download the cutter to print on your own 3D printer continue reading.
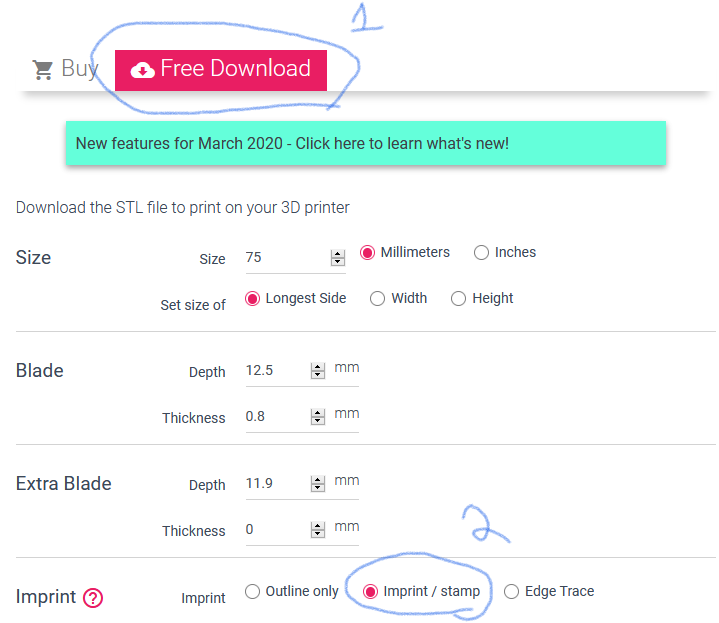
Now click "Free Download" and then click "imprint".
Your cutter is nearly ready. However the pieces are all disconnected. To connect them, choose a horizontal or vertical center bar and increase the size until all the pieces are connected. For this design I chose a horizontal bar with a width of 60.

The cutter is ready for download!

Click "Download STL" and your STL will save to your computer. Now open this file in your slicer and 3D print it! If you don't have a 3D printer you can use the buy tab to purchase your cutter from us.